

Mochaccino layer cake
这是一个真正的贷款。的黑巧克力d coffee cake is coated in a delicious coffee frosting. It’s easy to bake and fun to assemble, so even a novice can produce a great-looking, great-tasting result.
- 1 hr preparation
- 1 hr cooking
- Serves 12


Ingredients
- 1 2/3 cup flour
- 1 1/2 cup sugar
- 1/3 cup cocoa
- 1 1/2 teaspoon baking soda
- 1 teaspoon salt
- 1 teaspoon instant espresso-style coffee dissolved in ½ cup hot water
- 1 cup milk
- 100 gram melted butter
- 2 eggs
- 1 teaspoon salt
- 1/4 cup water
- 1/4 cup sugar
- 1/4 cup white rum
- 90 gram kremelta, at room temperature
- 90 gram butter, at room temperature
- 3 1/2 cup icing sugar
- 1 1/2 teaspoon instant coffee dissolved in 2 tablespoons hot water, then cooled
- 1 tablespoon milk
- decorations of choice
Method
-
1Preheat the oven to 180°C. Grease and line the base and sides of a 20cm loose-bottom cake tin. Put all the cake ingredients into a food processor and pulse to mix; this will produce quite a liquid batter. Pour batter into the prepared tin.
-
2Bake for at least 1 hour or until a knife inserted into centre of cake comes out clean. The cake should spring back when gently pressed. Cool in the tin for a few minutes, then remove from tin and transfer to a rack to cool completely. The cake rises a lot − if you want to, trim the top to make it flat. Slice cake into 3 layers. This can be done with dental floss (see Cook’s Tips) or with a long serrated knife.
-
3If using rum syrup, combine all ingredients, then brush it liberally over the top of each cake layer. Apply more syrup as it is absorbed, until all the syrup is used.
-
4To make the frosting, beat the Kremelta and butter together until fluffy; don’t skimp at this stage – allow 4 minutes for beating with an electric beater. Add the icing sugar 1 cup at a time, alternating with coffee mixture and mixing well after each addition, then add the milk.
-
5Working from the centre out, spread the base and centre layer with frosting and stack one on top of the other on a plate or cake stand. Add the top layer and place a large quantity of frosting in the middle.
-
6With a spatula or palette knife, begin working the frosting gently over the top and towards the edges of the cake, adding more frosting to the middle and working it out and down the sides.
-
7Smooth the frosting over the sides and, when the whole cake is covered, run the flat side of the spatula around the cake vertically to create straight sides. To give a smooth finish, dip the spatula in hot water and dry it before using.
-
8Decorate cake with chocolate curls or flakes, chocolate coffee beans, truffles, Maltesers or fresh flowers such as roses, depending on the occasion.
Notes
Gluten-free version: The gluten-free version needs more solids in it than the wheat-flour version so I increase the flour to 3 cups, using a blend of 1 cup rice flour, 1 cup tapioca flour and 1 cup cornflour, plus 1 tsp xanthan or guar gum. Reduce liquid by dissolving coffee in ¼ cup hot water and use only ¾ cup milk. Ensure icing sugar is gluten-free. Cutting the layers: Freshly baked cake has a tendency to crumb, so cleaner cuts will result if the cake is a day old before slicing and icing. To cut perfectly even layers, use a ruler to measure the levels and mark them with toothpicks around the cake. Cut a long strip of plain dental floss and wrap it around the cake on the side furthest from you, lining it up with the toothpicks. Use a gentle sawing motion to cut through the crust, then draw the ends of the floss towards you and together so they overlap, pulling floss through the cake, resulting in a quick, even layer.
The Latest from Food To Love
-
Kitchen Tips 5 cosy dishes our team makes when we are craving comfort food
Food To Love
Mar 30, 2020 -
Kitchen Tips These storage tricks will help your fresh fruit and veg last longer
Good Health & Wellbeing
Mar 24, 2020 -
-
-
Kitchen Tips 5 go-to lazy dinners our team makes when they don't feel like cooking
Food To Love
Mar 19, 2020 -
-
-
-
-
Kitchen Tips 5 dishes that are ideal for cooking in bulk and freezing for later
Food To Love
Mar 10, 2020 -
-
-
-
-
-
-
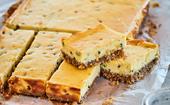
Recipe Passionfruit cheesecake slice with a gingernut and oat base
New Zealand Woman's Weekly
Mar 03, 2020 -
-


read more from